- Interior & comfort
- Be the first to comment!
- Read 5931 times
Electric windows
Upgrading manual windows to electric is a popular, if slightly involved mod. It is a worthwhile modification however, and can really make you feel more at home if you are used to your creature comforts.
67Difficulty4Tools required7Time required5Price
Equipment Required
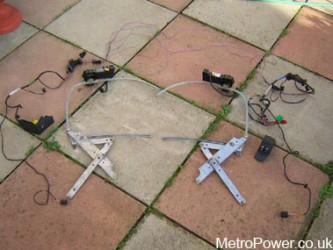
- Electric window motors LH and RH
- Metro double electric window switch and a single switch
- LH & RH Plastic door pocket switch housing trims
- Door wiring looms
- Central wiring loom harness & earth wire
- Yellow fuse box relay
- Winder hole blanks
Metro Models applicable for this guide
- Rover Metro mk3 - all models*
- Rover 100 mk4 - all models*
- Austin/MG Metro mk2 - all models*
* = Will fit as long as central locking is already fitted as standard or as an upgrade as the e/w shares some of the same wires. All the fixing holes are on every K-series metro as standard and electrical connectors on the fuse box.
The wiring for the electric windows must be from the same type of Metro, as the connectors are different on A-series and K-series cars, thus meaning a Mk2 VDP for example, will not connect to the K-series connectors. The Motors and lift mechanisms are the same on all. Also A-series owners will have to refer to the Haynes guide for the fuse box power supplys.
- Remove the door cards and to gain access to the window lift mechanisms.
- Remove the draft excluder as carefully as possible as this also stops the door card getting damp.
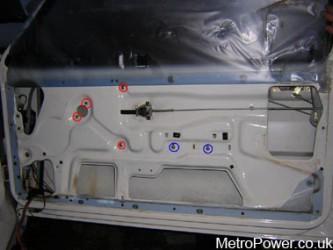
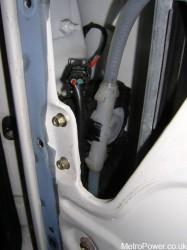
- The old Mechanisms are held in by four 8mm bolts located on this picture of the right hand door.
- The red rings locate bolts that must be removed and the blue are ones that it might be easier to loosen to remove the manual mechanism.
- Remove the manual mechanism by pushing sides which ever way is easiest. It is advised that you find someone to hold the glass in place as it will not be supported.

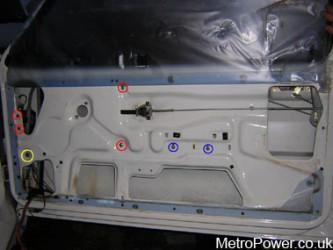
- Next you will need to remove the front window track which is held in with one bolt which I have circled yellow and when the bolt has been removed is pulled down and then removed to fit the motor in place.
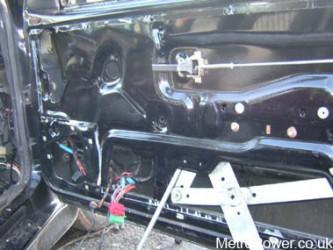
The picture of the black door shows the mechanisms being removed/fitted to the door with side impact bar.
The red circles are the new locations of the electric window mechanisms and the blue are again the ones the might need to be loosened for adjustment of the runners. The electric versions will not fit through the gap at the bottom of the door if there in the fully up position so it might be worth send a tiny bit of power through them to lower so they will fit through the gap.
Close up of the Right hand electric window motor and window runner track.
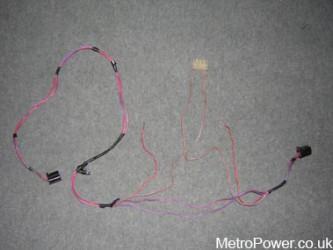
- Disconnect the central door locking motors and remove the normal door looms, refit with the electric window door looms. (Drivers side with the 2 switches)
Note - You might have to make a small adjustment to the drivers door loom if you have a remote central locking car but the looms were not from a remote model as it will have 1 less wire that needs adding.
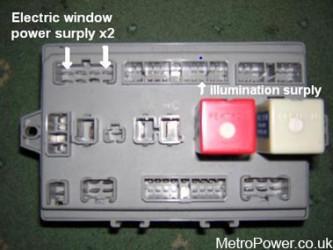
- Now unscrew the 2 8mm bolts on the fuse box and remove relevant connectors to gain access to the back of the fuse box to add the electric window central loom harness.

- Plug the end into the pins on the back of the fuse box that have been marked as these will be unused and will slot straight in.
(Note for some Metro's & Rover 100s, you will need to add an extra earth wire. Check the picture and see if your loom has the wire or not. The earth is for the fuse box to earth the new yellow relay you have just added for the e/w. As standard this wires earth point is behind the front left head lamp, but any good earth point will do. - Refit the fuse box and fit your extra yellow relay in the gap in the middle at the bottom on the fuse box on the side which faces the rear of the car. This is just a normal relay like the others on the fuse box.

- Next up thread the wires behind the dash to the doors and connect them up to the door looms
- Push out the e/w wires hole on the door cards
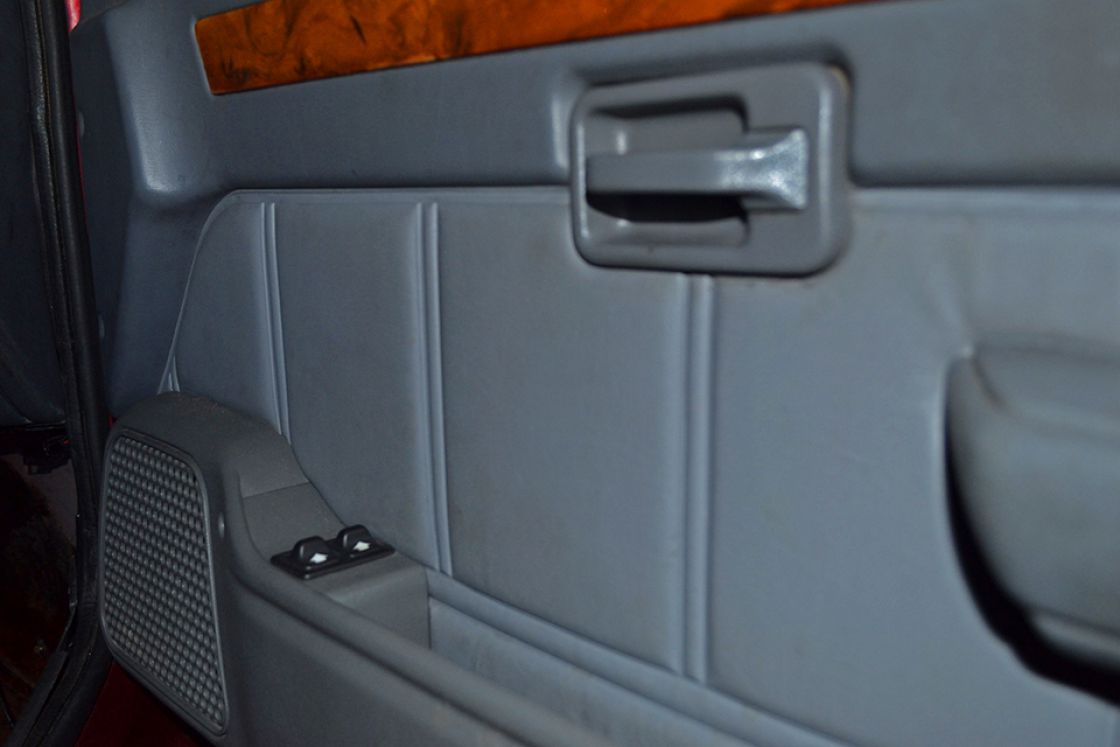
- Replace the draft excluder sheet and stick it back down and refit the door cards and door furniature to your door. Don't forget to fit your new switch holders to your existing door pockets.
Testing
Test to see if your windows work and the switches illuminate when the lights are on.
Note the windows only operate when the ignition is on position 1 or more.
Additional information
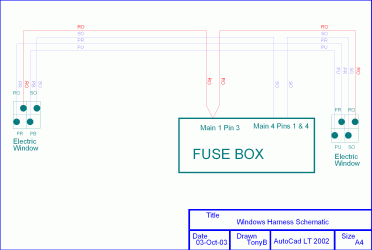
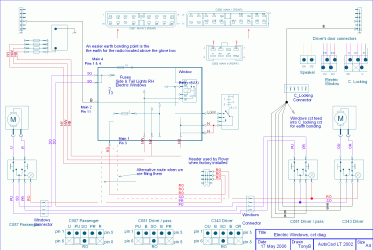
K-series Electric window Wiring Diagrams drawn and submitted by Tony Benton
(click images to enlarge)


