- Interior & comfort
- Be the first to comment!
- Read 6188 times
Rover Coupe \ MG ZR seats
How to fit Rover Coupe or MG ZR seats onto Metro bases for a nice comfortable upgrade from standard. If you fancy something different to a GTi seat upgrade Rover Coupe interiors are your best bet. Try to find a half or full leather set for a really high end look. The seats also come with lumbar adjusters for added comfort. You can also use an interior from Rover 214 models; however as these are 5 door cars the seats won’t tilt forward.
66Difficulty5Tools required6Time required6Price
Parts required
- Pair of front seats from donor car (Coupe, 214, Cabriolet etc)
- Torx bits T40 and T50 & wrench with necessary attachments
- Screwdrivers (flat and cross head)
- Claw hammer
- Torx bits
- Socket set
Also consider whether you wish to upgrade to a black carpet whilst the seats are out.
Removing the Coupe seats
Easiest thing is to remove the entire seat assembly then work on it at home at your leisure, although if you want you can just remove the parts you need by following the steps later on in the guide and leave the Coupe metal base behind.
- The seats are secured by 4 bolts, 2 at the front and 2 at the back.
- Slide the seat all the way forward to remove the back bolts and vice versa.
- Be careful of the bolt near the transmission tunnel, it’s awkward to get at and the star head can round off.
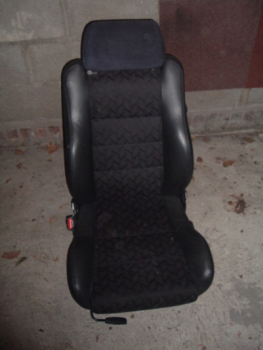
- When done lift out of the car and you’ll have the same as the picture below.

Stripping down your old seats
- What you need to do now is strip the Coupe seats down, split the base from the back rest and remove the material from the metal frame.
- Turn the seat on its side with the recliner/lumbar adjuster facing upwards towards you.
- First thing is to remove the recliner handle. Using a flathead screwdriver prise the handle apart gently and remove (should be 2 separate pieces).
- You will see a plastic cover (see below), this needs to be pulled off from the seat. If you look along the top edge you’ll see it clips around the seat base. Grab this part first and give it a good tug to remove. There’s three plastic pop clips holding the trim in place, they can be quite stubborn to remove so elbow grease will be needed here!

- Repeat for the other side, in this case the trim is smaller and obviously no handles to remove.

If you look at the seat with the covers removed you should be able to see a large black bolt that holds the seat
together at the pivot point. If you’re unsure tilt the seat forward and look for the point it moves around. This is the
Once the bolts are undone on either side the rear section of the seat (backrest) should pull free of the base. If it’sstuck hold down the recliner lever while lifting the backrest away.
You should now have the seat in two pieces as shown in the picture below:
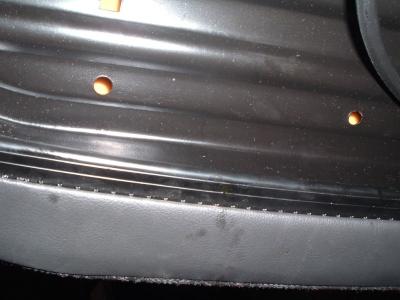
Next part is to separate the sponge/material from the Coupe metal base. It’s clipped
onto the bottom of the base at the front, back and sides. Front and back are longerclips that run the width of the seat, two side ones are shorter and easier to remove.
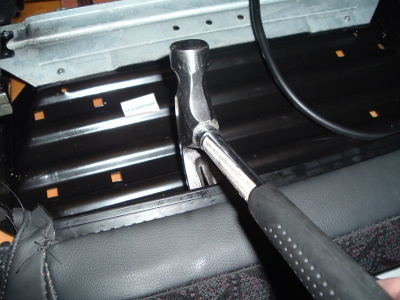
My method for unclipping was to prise a flat blade screwdriver at the ends of the clipsand twist so the ends pop out. Then use the claw end of the hammer to pull up at each
end, working towards the middle. Takes a bit of effort but once one of the largerAlso note one side of the seat has a plastic
trim piece in the way. Pop off the two screw covers and undo to release.
You should now have the material and base separated. Remove the original seat from your Metro/100 (again 4 bolts, Torx T40 in this case) and repeat the same steps as above. Be careful when removing the plastic plates at the side of the seats as you’ll need these later on. Also don’t lose the two metal restrictors at the front of the seat rails, they stop the seat sliding all the way forward and coming off the runners!
Once done you should now have two metal seat bases, two lots of sponge/material base and two backrests. You will notice that the wireframe support on the Metro base is different to the string/material support on the Coupe ones. I didn’t try to swap these as the fittings seemed to be in different places, doesn’t make much difference and in my opinion helps soften the Coupe seat slightly, making it more comfortable.
Putting it all back together
Now for the easy bit...
- Clip the Coupe material onto the Metro base, should go on with minimal effort.
- Grab your Coupe and line it back up to the bolt holes on the base.
- Add 1 x Torx T50 to each side and you should have something resembling a seat again
- Re-fit the plastic side trims and recliner handles et voila, one Coupe seat with Metro base!
- Refit to car is reverse of removal (4 x Torx T40).
- Repeat the whole process with the other seat and you’re done, all that’s left now is to enjoy your new interior!
And here’s some we made earlier...
Rover Coupe and MG ZR seats pictured below...


