- Members' Metros
- Posted
- Read 4558 times
Josh Briody's 114 GSi "Olivia"
Josh Briody writes about the story of his 1995 Rover 114 GSi automatic, Olivia.
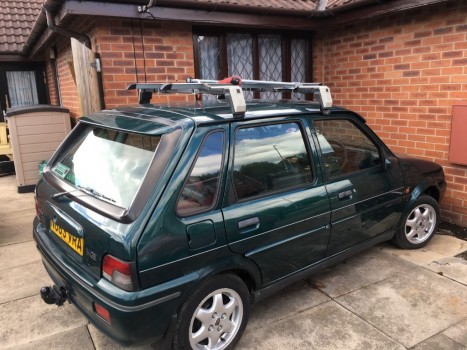
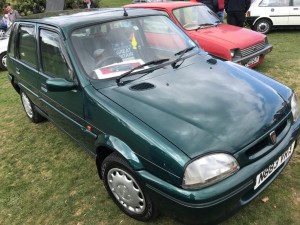
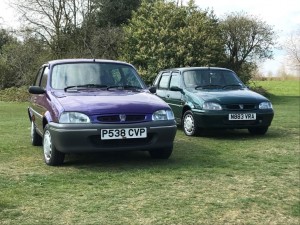
I was walking my dog past a used car dealer and my eyes were drawn to the British racing green rover 100 with wood trim electric windows and only 24,115 miles. I kept looking at it and eventually I bought her on 7th June 2013. She was completely original when I bought her but started to realise the rear arches were rotten as I could fit a screwdriver and the handle of an adjustable wrench in one of the arches too. This was only the start of it. I did my research and found it was registered new on the 1st August 1995 when the new reg came out at W.A Hatfields West Bridgeford, Nottingham.
Once I got it home I started cleaning the car up. Cleaned the engine bay as it looked like it had never had a clean and the same as the interior.
The first things I did was fix the arches but messed it up and left it as a bad try. After that, I found a set of the original alloys with 5 centre caps! The rocking horse ones… I decided to see if they would fit and what they looked like but at this time I was young and didn't realise that you needed alloy wheel nuts with alloys. Took it for a drive around my estate and the front wheels decided to part company with the rest of the car, they had slipped over the nuts. A mistake I will never make again!
After getting the correct wheel nuts I then turned my attention the rear end. I purchased a complete GTA tailgate with all of the 4 spoiler caps. I swapped that over. Fortunately, it was the same shade of British racing green, not the later darker one. It looks so much better with the spoiler than without. This didn't come without issues either as the gas struts were on the way out and a tailgate to the spine isn't the best of things.
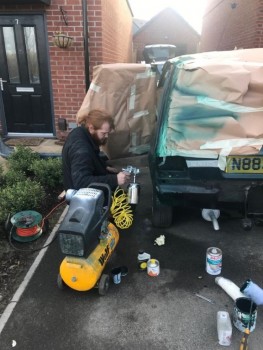
It was nearly there, and I was getting closer to passing my driving test. I decided to paint the front and rear bumpers as they were showing their age with scuff marks and chips. I started rubbing them down and found the front one was beyond repair as it had a large crack in it and managed to get another one. So I bought a compressor and sprayed them in my back garden. I was happy with the results to say it was a cheap back garden spray job. Got the bumpers fitted back on the car. With a set of 6-inch ring spot lamps on the grill too.
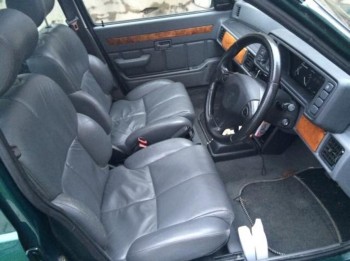
At this time I had taken my driving test and passed! Got the car through the MOT, no major problems just a couple of advisories but no biggies. Had the car on the road about a month and saw a 1.4 Mk3 being broken with a nice grey leather interior so that was purchased and put into the Rover 100. It was much more comfortable and like a GSi should be.
The crash
Then late February 2015 it happened...
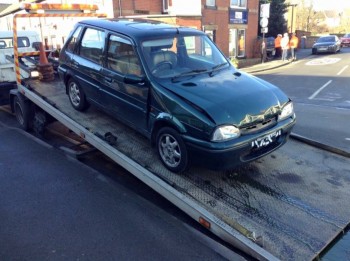
An ambulance came past with sirens blowing so everyone pulled over to the side of the road. Pulling off from the side the van in front of me stopped without any warning with a clear road and had nowhere to go but into his tow bar. According to them I pushed a van with two people in into another car causing damage at less than 5 mph... work that one out...
I never claimed on the car so I got it without anyone looking at it or taking it away so it was mine to do whatever I wanted to do with. A lot of people were telling me the car was bent and no point in fixing it and I was best breaking it, but I had other plans than that. I started collecting what parts I thought needed.
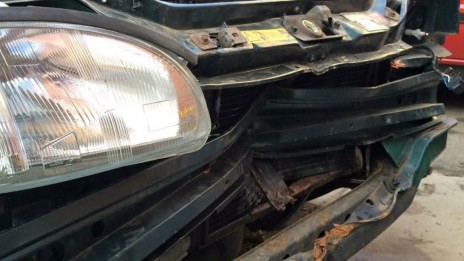
The damage
- the bumper was cracked
- bonnet pushed up
- wings had been bent in as the slam panel bent down,
- the impact bar took the tow bar impact and pushed a hole through the radiator, pushing the engine back...
- ...which snapped the engine mount and pushed the cambelt cover into the header tank cracking that.
I got the main panels and parts within weeks and put the wings on to see if they lined up and they did perfectly, so I knew it wasn't bent as people were saying. The project got put on hold due to a house move and after all that was sorted I started stripping the impact bar and radiator off to find the fan motor had snapped the solenoid off the starter motor.
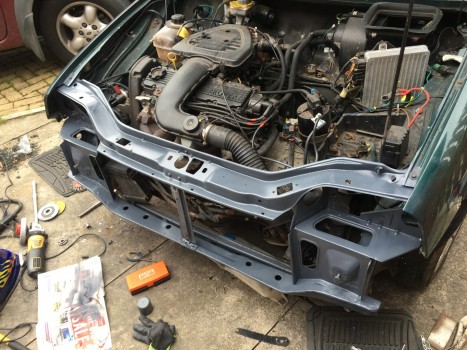
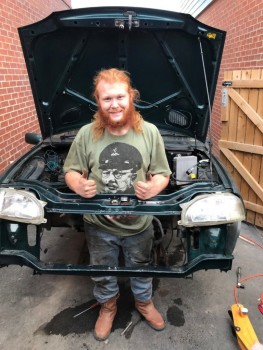
Then it was the main job, the front panel replacement. I can't afford body shop labour, so it was my turn to do it myself again. I started cutting the main sections out with an angle grinder to make it easier to get to the spot-welds to drill out. Most of them are easy to get to, apart from the ones where you must drop the front subframe. It took a lot of fettling and lining up with screws, but it was eventually all welded up and then painted. It was starting to look like a car again nearly two years after the accident.
Eventually, I changed the bent transmission cooler, new radiator and got it running again until I found a hole in the trans cooler shooting fluid everywhere, I traced another one and fitted it. It was alive! Hopes were dampened when the car wouldn't start again and found it was the multi-function unit had failed, ordered a replacement and it fired into life eventually. It still needs little things sorting before it can go back on the road again, but the accident damage has gone.
So close but so far...
At this point, the old girl was not too far off being complete and the MOT station was getting closer. I had to move the car into a lock-up a mile down the road. She sat in the lock-up for about a year when I realised the front passenger tyre was flat. Out she came and out came the jack, this is where the light at the end of the tunnel was switched off and the bulbs removed. The jack went straight through the floor. Back she went into the lock-up and the door was shut for a good 12 months.
December 2017 came around and I moved out of my parents' house to my own house that had a large drive and garage. This is when the Rover 100 came back into my thoughts. My fiancée gave me the challenge to get Olivia fixed and roadworthy for Pride of Longbridge in April 2019. With help from someone in the club the Rover 100 was bought to my house for the assessment and rebuild to begin.
The rebuild
I could tell from the offset I had a good amount of work set out for me as the brakes kept locking on and with the big bulge in the carpet in the footwell.
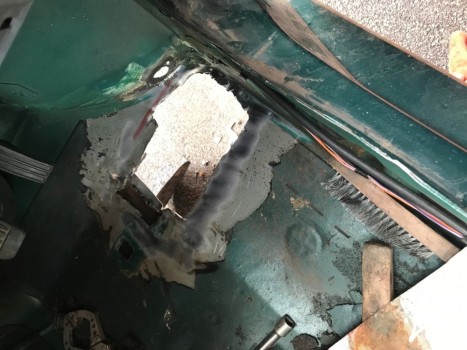
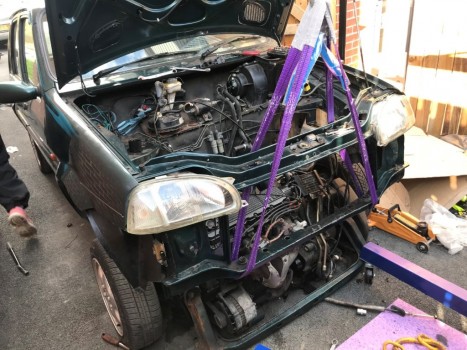
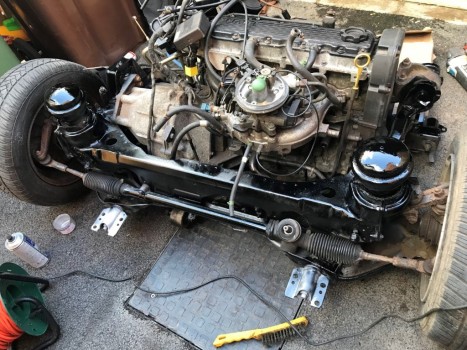
The first steps were to start the strip down. The rotten exhaust came off first then the engine, gearbox and subframe came out in one go. At this stage, I could see the extent of the damage to the floors. It wasn’t a surprise to find the drivers footwell and jacking points had gone as well. The interior came out to start the metalwork. On further inspection, I found a plate had been tacked welded into the passenger footwell so no wonder it had gone again.
After chopping out what was bad I had a good 12-inch square hole to fill in somehow. Halfway through welding, the plates in my welder decided it didn’t want to be a welder anymore, so I finished the job with a borrowed one. With that all seam-sealed and painted I started on the driver’s side. I had to chop the same amount of rotten steel out of this side too. A set new old stock jacking point panels made the job easier.
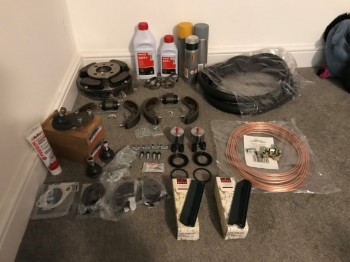
Now the metalwork was done at the front my focus was now on the front subframe. It was cleaned, and the rust removed with a wire brush and painted. The subframe went back into the car in late September with new copper brake pipes and new flexis too. October was upon us now and focus has changed once again. It was time to sort the back of the car out. Firstly, the rear subframe had to come out followed by the fuel tank, which resembled a rusty colander rather than a fuel tank. That had to go and the source for a new one was on.
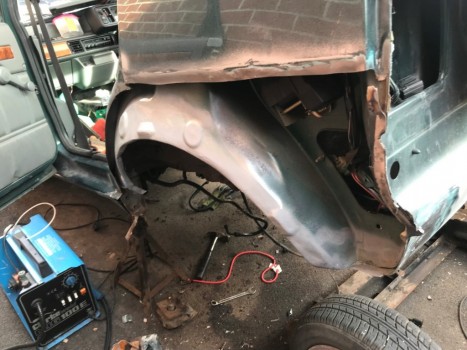
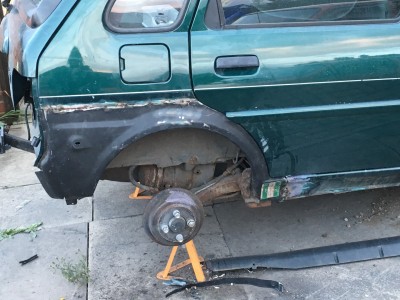
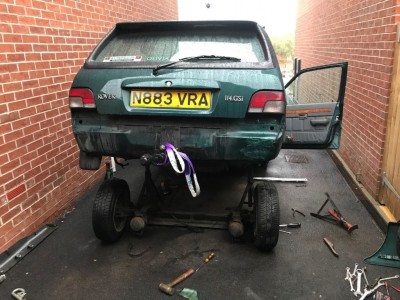
Now the car was in the air it was time to tackle the passenger rear quarter panel. This was replaced myself many years ago, my first attempt at welding was not very good and full of filler. I already had a replacement panel for this so the old one was chopped out and a new one welded in. The rear subframe had the same treatment as the front, cleaned of all the old paint and rust the primed and painted ready to be put back in, once I had sourced a new fuel tank from a club member. Now back on the ground, it was the smaller things that needed to be checked.
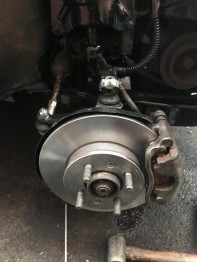
By this time, it was December. I stripped the whole rear brakes and replaced everything excluding the backplates and drums. Christmas came so work had to stop. Late December I stripped the front end and replaced all the ball joints at the front, upper, lower ball joints and track rod ends. The brake callipers were removed and rebuilt. On removal I could throw the pad carrier on the floor and the pad stayed where it was they were that seized. The callipers with new disks and pads were assembled on New Year's Eve 2018. Late on that night, I celebrated by driving the 100 up the street and back down to test the brakes. The lights at the end of the tunnel had been switched back on!
4 months to go
In January the rest of the interior was put back in, so it resembled a car again, finally! Other than that, not much was done in January.
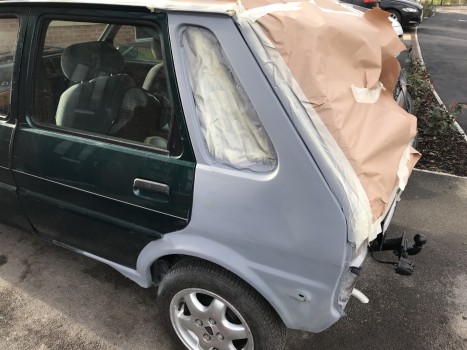
February, time to get the bodywork sorted. The rear arches were sanded and filled. The driver’s side I was able to only paint half of it but unfortunately, the passenger rear quarter had to be fully painted top to bottom. As it was done outside it was not perfect by any means but its body colour and that is all that matters.
After the paint had dried and set it was time to refit the side skirts, mud flaps and inner wheel arches. The old alloys were changed for freshly painted steel wheels with good tyres and a good set of wheel trims were fitted. All it now needed was a good service. The inhibitor switch on the automatic gearbox was changed along with the auto box fluid and engine oil + filter.
Before the MOT the hotel for Pride of Longbridge and the tickets for the National Mini and Metro show had been booked so there was no going back.
8th March came. MOT time!!!
A big fat FAIL
- Airbag light on – stupid me forgot to connect the airbag, the garage let me sort it.
- Headlight aim too high – garage sorted this.
- Wing indicator not working - the garage let me sort it.
- Exhaust reading too high - garage sorted this.
- Handbrake efficiency - garage sorted this
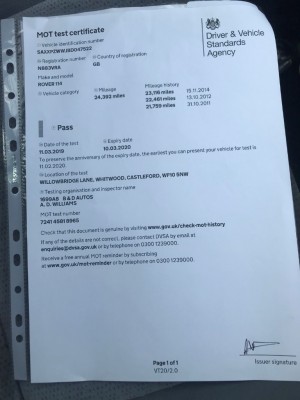
She was retested on the 10th March and PASSED! With a clean sheet.
Showtime
April arrived, PoL was getting closer. A good friend helped me change the leaky window rubber for a brand new one form Ralph at Component Engineering
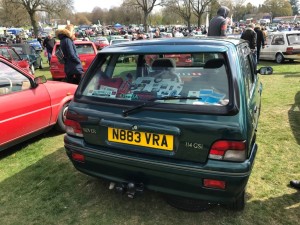
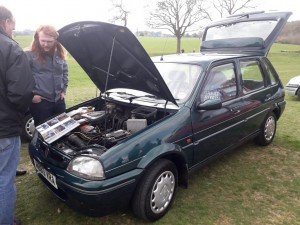
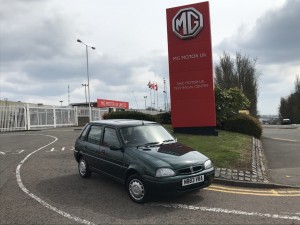
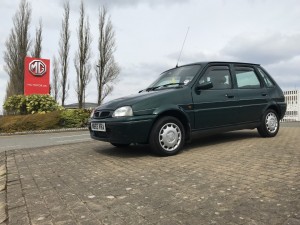
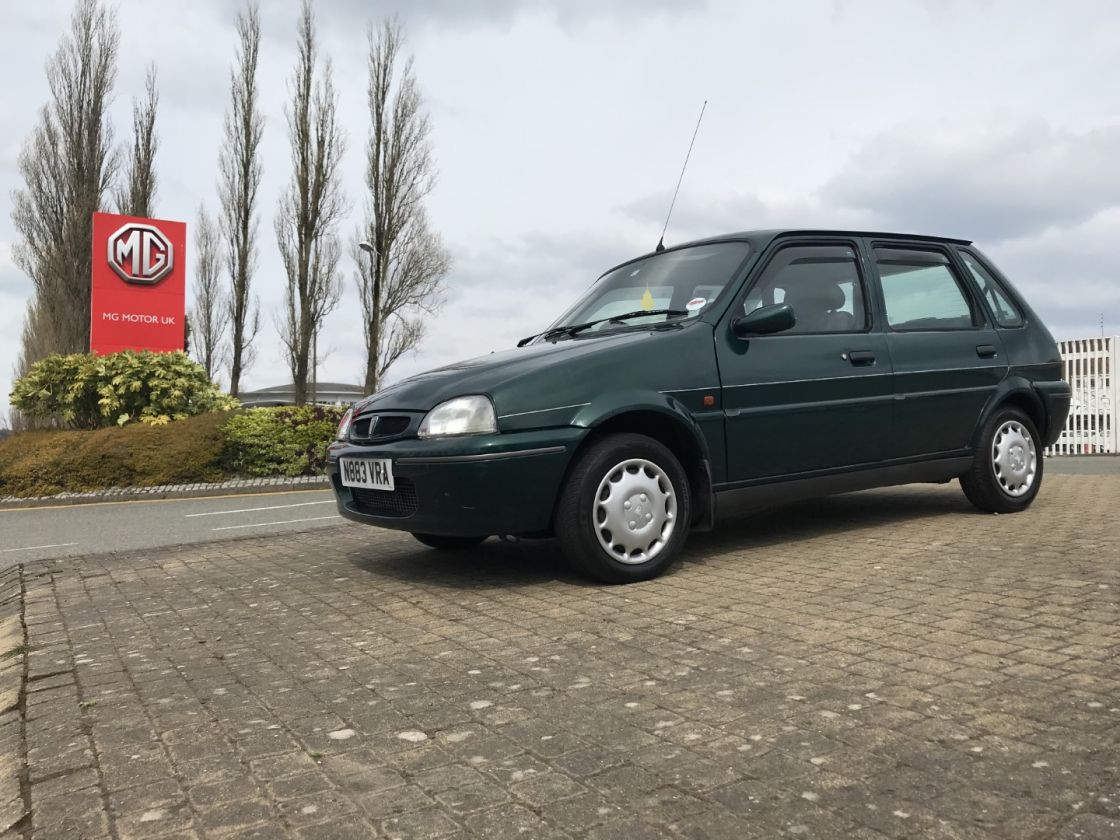
The weekend before PoL was here and it was time to get the old girl cleaned and polished for the big day. Friday the 12th April was here. Birmingham here we come. Saturday 13th the feeling of driving into Crofton park for the first time in the 100 was great. Olivia was well received by the Metro community by the looks of it. The day later we went back to get the beauty shots of her on the plinth outside Q Gate.
A very happy ending for what was a sad story that makes everything worth the scuffed knuckles and the disappointment of things not working.
Never give up on a car.
Thank you for taking time to read my story of the rebuild of my first car.
Josh


